Open-and-go lessons that inspire kids to love science.
Science curriculum for K—5th grades.
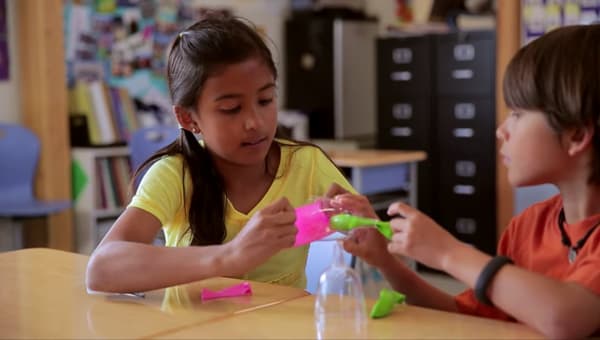
- Hands-on — lead students in the doing of science and engineering.
- Standards-aligned science lessons — Cover core standards in 1-2 hours of science per week.
- Less prep, more learning — prep in minutes not hours. Captivate your students with short videos and discussion questions.
Sign up now to try Mystery Science for free.
Science Units
About this Unit
Print AllIn this unit, students investigate the properties of matter by dissolving everyday chemicals to make solutions and by exploring simple yet surprising chemical reactions. Through these investigations, students begin to build conceptual models for the particulate nature of matter.
Standards
Unit Resources
Assessments
This 3-dimensional summative assessment includes a variety of visual cues and question prompts (multiple-choice, true/false, short answer). It should take 30-40 minutes for a student to complete.
Unit assessmentFor your reference, these are all the assessments included at the end of each Mystery from this unit:
Lesson 1: Conservation of Matter
Lesson 1 assessmentLesson 2: Dissolving & Particulate Nature of Matter
Lesson 2 assessmentLesson 3: Properties of Matter: Acids
Lesson 3 assessmentLesson 4: Chemical Reactions
Lesson 4 assessmentLesson 5: Gases & Particle Models
Lesson 5 assessmentPacing Guides in Google Sheets
Pacing Guides in Excel
Note: We've optimized for Google Sheets as it's free for all users. Excel downloads may have formatting differences.
Lesson 1: Conservation of Matter
Test Like An Alchemist
| Alchemist’s Potion, Part 1 worksheet | 30 copies |
| Container Labels printout | Print 1 copy |
| Test Like An Alchemist printout | Print 8 copies |
|
Clean-up Supplies (Eg. Paper Towels)
|
1 roll |
|
Liquid Soap
Can also use liquid detergent.
|
Details
2 tablespoons
|
|
Scotch Tape
|
1 roll |
|
Measuring Cup
|
1 cup |
|
Measuring Spoons
|
1 set |
|
Plastic Containers w/ Lids
Each container needs to hold just over 3 cups.
|
Details
4 containers
|
|
Salt
You’ll need another cup of salt for Mystery 3, so we suggest getting a 26 oz container.
|
Details
1 cup
|
|
White Vinegar
You will also need vinegar for other lessons in this unit, so we suggest getting a gallon.
|
Details
4 cups
|
|
Pennies (must be pre-1982)
Each student needs one penny, but if you're working in a small group you need a minimum of 20. We suggest having a few extra in case some get lost.
|
Details
30 coins
|
|
Steel Nails
It’s important that you get steel nails (or steel washers)—NOT stainless-steel and NOT galvanized steel. For Mystery 2, each group of 4 students will also need one nail.
Jumbo paper clips will also work, but the results are harder to see.
|
Details
1 nail
|
We suggest students work in groups of four. Homeschool students can work on their own.
You will need access to water for this activity.
You will need old, tarnished pennies for this activity. You must use pennies dating from BEFORE 1982, when they were made from 95% copper. (Pennies made after 1982 are copper-plated zinc, which won’t work for this activity.)
We suggest asking students to bring in pennies made before 1982. You can also buy penny rolls at the bank. We bought $3 worth, sorted out the pre-1982 pennies, and had exactly 40 to work with. If you are working with a homeschool student or small group, you’ll need a minimum of 20 pennies.
Optional: Each student can use orange and brown colored pencils or crayons to show the coloration of the dull and shiny pennies on their worksheets.
In the next lesson, you’ll need to reuse some of the materials from this activity so students can copper plate a steel nail. See instructions below.
Prepare Your Testing Liquids
Cut out the Container Labels and tape one to each of your four plastic containers. You now need to prepare the four testing solutions - one for each container. If you’re working with a homeschool student or small group, you can cut the following “recipes” for each solution in half.
- Soapy Water: Mix 2 tablespoons liquid soap (or detergent) with 2 cups water.
- Vinegar: Pour 2 cups of vinegar.
- Salt & Vinegar: Mix 6 tablespoons salt with 2 cups vinegar. The salt won't all dissolve, but add it anyway.
- Salty Water: Mix 6 tablespoons salt with 2 cups water. The salt won't all dissolve, but add it anyway.
We recommend placing each container in a separate area of the classroom as a test station.
Save Materials and Prepare for the Next Lesson
Save student work: Students will need their completed “Alchemist’s Potion, Part 1” printouts for the next lesson. Make sure they’re stored somewhere safe.
Save the pennies in the Salt & Vinegar solution: At the end of this lesson, you’ll dump all the pennies into the Salt & Vinegar to soak overnight. (If you made just 1 cup of Salt & Vinegar, dump at least 20 pennies into it.)
Add a nail: After students have left class, we recommend that you put a nail into the Salt & Vinegar solution with the pennies — but don’t tell your students you’re doing it. You’ll find out why in the next lesson, when your students will discover that the solution the pennies soaked in can change steel in a surprising way.
Lesson 2: Dissolving & Particulate Nature of Matter
The King's Sword
| Alchemist’s Potion, Part 2 worksheet | 30 copies |
|
Alchemist's Potion worksheet from Chemical Magic Lesson 1
Completed in the previous lesson.
|
Details
30 printouts
|
|
Clean-up Supplies (Eg. Paper Towels)
In case of spills.
|
Details
1 roll
|
|
Salt & Vinegar Solution from Chemical Magic Lesson 1
Filled with pennies and a steel nail.
|
Details
1 container
|
|
Dixie Cups (3 oz)
|
8 cups |
|
Medium Binder Clips (1 1/4")
Used to clip Ziploc bags to the plastic bin.
Clothespins or masking tape can also work.
|
Details
8 clips
|
|
Paper Plates
Plastic plates will also work.
|
Details
8 plates
|
|
Plastic Bin
Used to store Ziploc bags for students. Bin must be large enough so that all groups of students can clip their bag to the sides of the bin (8 Ziploc bags for a class of 32).
|
Details
1 bin
|
|
Plastic Spoons
|
4 spoons |
|
Sticker Labels (1" x 3")
Masking tape will also work.
|
Details
16 labels
|
|
Ziploc Bags (Sandwich Size)
Ziploc snack size bags also work.
|
Details
8 bags
|
|
Steel Nails
It’s important that you get steel nails (or steel washers)—NOT stainless-steel and NOT galvanized steel.
Jumbo paper clips will also work, but the results are harder to see.
|
Details
8 nails
|
To do this activity, you must have completed the activity in Lesson 1.
We suggest students work in groups of four. Homeschool students can work on their own, but will need help with some steps.
Remove the Steel Nail from the Salt & Vinegar Solution
At the end of the last lesson, you put all the pennies in the Salt & Vinegar solution, added a steel nail when students were gone, and then left the solution overnight. To prepare for this activity, check on that solution before class and look at the nail you put in. All or part of the nail should now be covered by a layer of copper.
Take the nail out of the solution, rinse it off, and set it aside to show your students during the last video. Save the penny-filled solution for students to use in this activity.
Prepare Materials for Classroom Distribution
Students will first need the following materials:
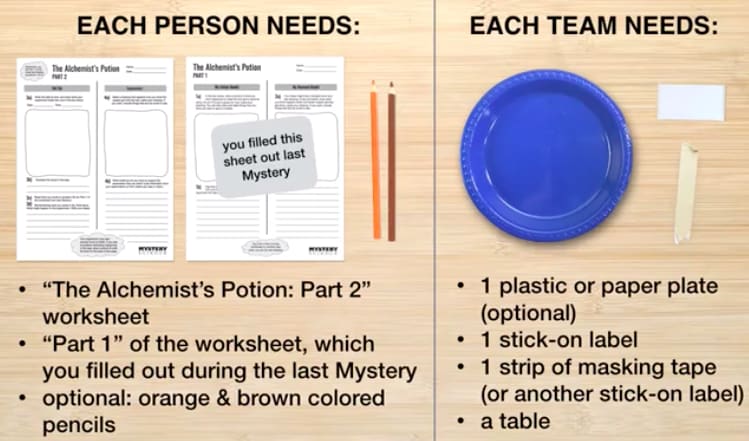
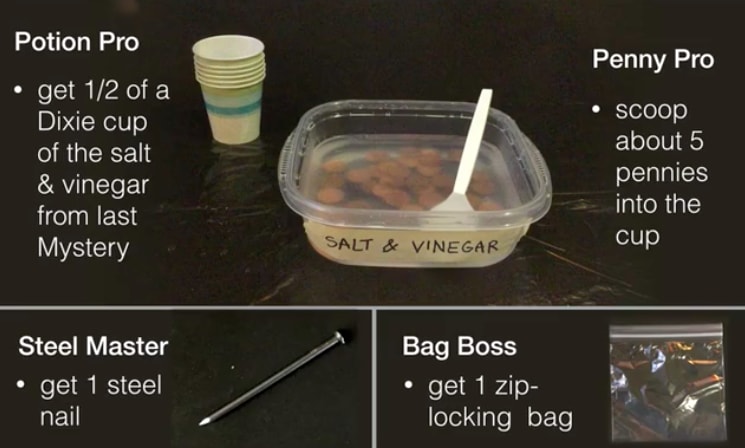
We then recommend you set up three supply stations around the classroom:
- Potion Pro & Penny Pro: Pennies in the Salt & Vinegar solution along with the spoons for scooping up pennies and one Dixie cup for each group
- Bag Boss: A Ziploc bag for each group
- Steel Master: A steel nail for each group
Have a Plastic Bin Ready to Store Student Experiments
If conditions are just right, copper forms on the steel quickly. But in many cases, students may need to leave their experiments for a few hours or even overnight to see results.
To store students' experiments overnight, we suggest taping or clipping the Ziploc bags to the sides of a plastic bin, with the bags hanging over the inside of the bin. This ensures that the nail remains submerged in the liquid. In the unlikely event that the bags leak, the bin will catch the vinegar.
Lesson 3: Properties of Matter: Acids
Acid Test
| Acid Test Results worksheet | 30 copies |
| Acid Test Results Answer Key teacher-only resource | 1 copy |
| Mixing Sheet printout | Print 15 copies |
| Testing & Acid Reaction Supply Mats printout | Print 8 copies |
|
Clean-up Supplies (Eg. Paper Towels)
|
1 roll |
|
Purple Cabbage (Chopped)
You can use 7 ounces dried black beans instead, but purple cabbage works better.
|
Details
2 cups
|
|
Table Covering (eg. Trash Bags)
|
16 bags |
|
1 Acid
You can use lemonade, ketchup, mustard, pickle juice, or yogurt.
|
Details
8 tablespoons
|
|
Baking Powder
|
8 tablespoons |
|
Baking Soda
|
8 tablespoons |
|
Coffee Stirrers
Craft sticks or spoons will also work.
|
Details
32 sticks
|
|
Dixie Cups (3 oz)
|
56 cups |
|
Measuring Cup
|
1 cup |
|
Measuring Spoons
|
1 set |
|
Plastic Bin
Must hold at least 4 cups of water. Used to make your indicator liquid.
You can also use a gallon-sized Ziploc bag.
|
Details
1 bin
|
|
Plastic Straws (Not Bendable)
|
20 straws |
|
Salt
|
1 cup |
|
Sheet Protector
You can also use taped-down waxed paper or Press n' Seal.
|
Details
15
|
|
Toothpicks
|
30 toothpicks |
|
White Vinegar
|
1 cup |
You will need access to water for this activity.
We suggest students work in pairs and two pairs of students share supplies at the same table group. Homeschool students can work on their own.
Prepare the Purple Indicator Liquid
If you’re using purple cabbage, put 2 cups of chopped cabbage in 1½ cups of water. Leave it for at least an hour, stirring occasionally. The cabbage will turn the water purple. Drain the chopped cabbage and reserve the purplish-pink liquid. If you’re using black beans, put 1 cup of beans into 2 cups of water and leave them for at least an hour. The beans will soak up some water and turn the rest purplish brown. Drain the beans and reserve the purplish-brown liquid.
Prepare the Straws
Cut each straw in half to make two short straws. Students will use these to transfer drops of liquid. (Full-length straws are likely to tip over cups.)
Prepare the Testing & Acid Reaction Supplies
Gather all of your Dixie cups and separate them into seven equal piles. You will fill the cups in each of these piles with a different liquid or powder.
- Water Cups: Add 2 tablespoons of water.
- Vinegar Cups: Use a permanent marker to label each of these cups with a “V” so students can quickly tell these apart from the water. Add 2 tablespoons of vinegar.
- Baking Soda Cups: Add 2 tablespoons of baking soda. (You may want to tell students that baking soda is different from baking powder.)
- Baking Powder Cups: Use a permanent marker to label each of these cups with a “BP” so students can quickly tell these apart from the baking soda. Add 1 tablespoon of baking powder.
- Purple Indicator Cups: Add 1 tablespoon of the purple indicator liquid that you prepared.
- Unknown Substance “A” Cups: Add 1 tablespoon of an unknown substance. We suggest using an acid such as lemonade, ketchup, mustard, pickle juice, or yogurt (there are many acids in the kitchen).
- Unknown Substance “B” Cups: Add 1 tablespoon of a different unknown substance. We suggest a non-acid such as salt water. (You can mix 1 tablespoon of salt into a cup of water.)
Separate Supplies for Easy Distribution
We recommend you set up four supply stations.
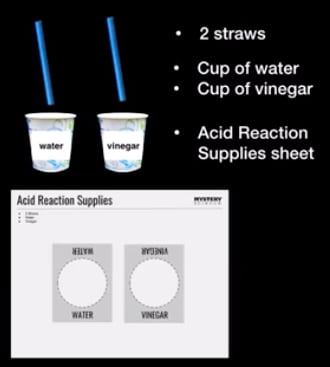
Station A: Acid Reaction Supplies
- “Acid Reaction Supplies” printouts
- Water Cups
- Vinegar Cups
- Straws (2 per group)
From this station, each group of students will bring the following back to their desk:
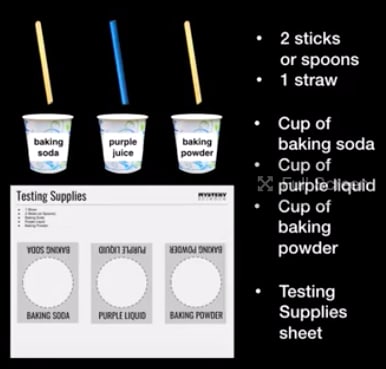
Station B: Testing Supplies
- “Testing Supplies” printouts
- Baking Soda Cups
- Baking Powder Cups
- Purple Indicator Cups
- Stir Sticks (2 per group)
- Straw (1 per group)
From this station, each group of students will bring the following back to their desk:
Station C: Worksheets & Clean-up Supplies
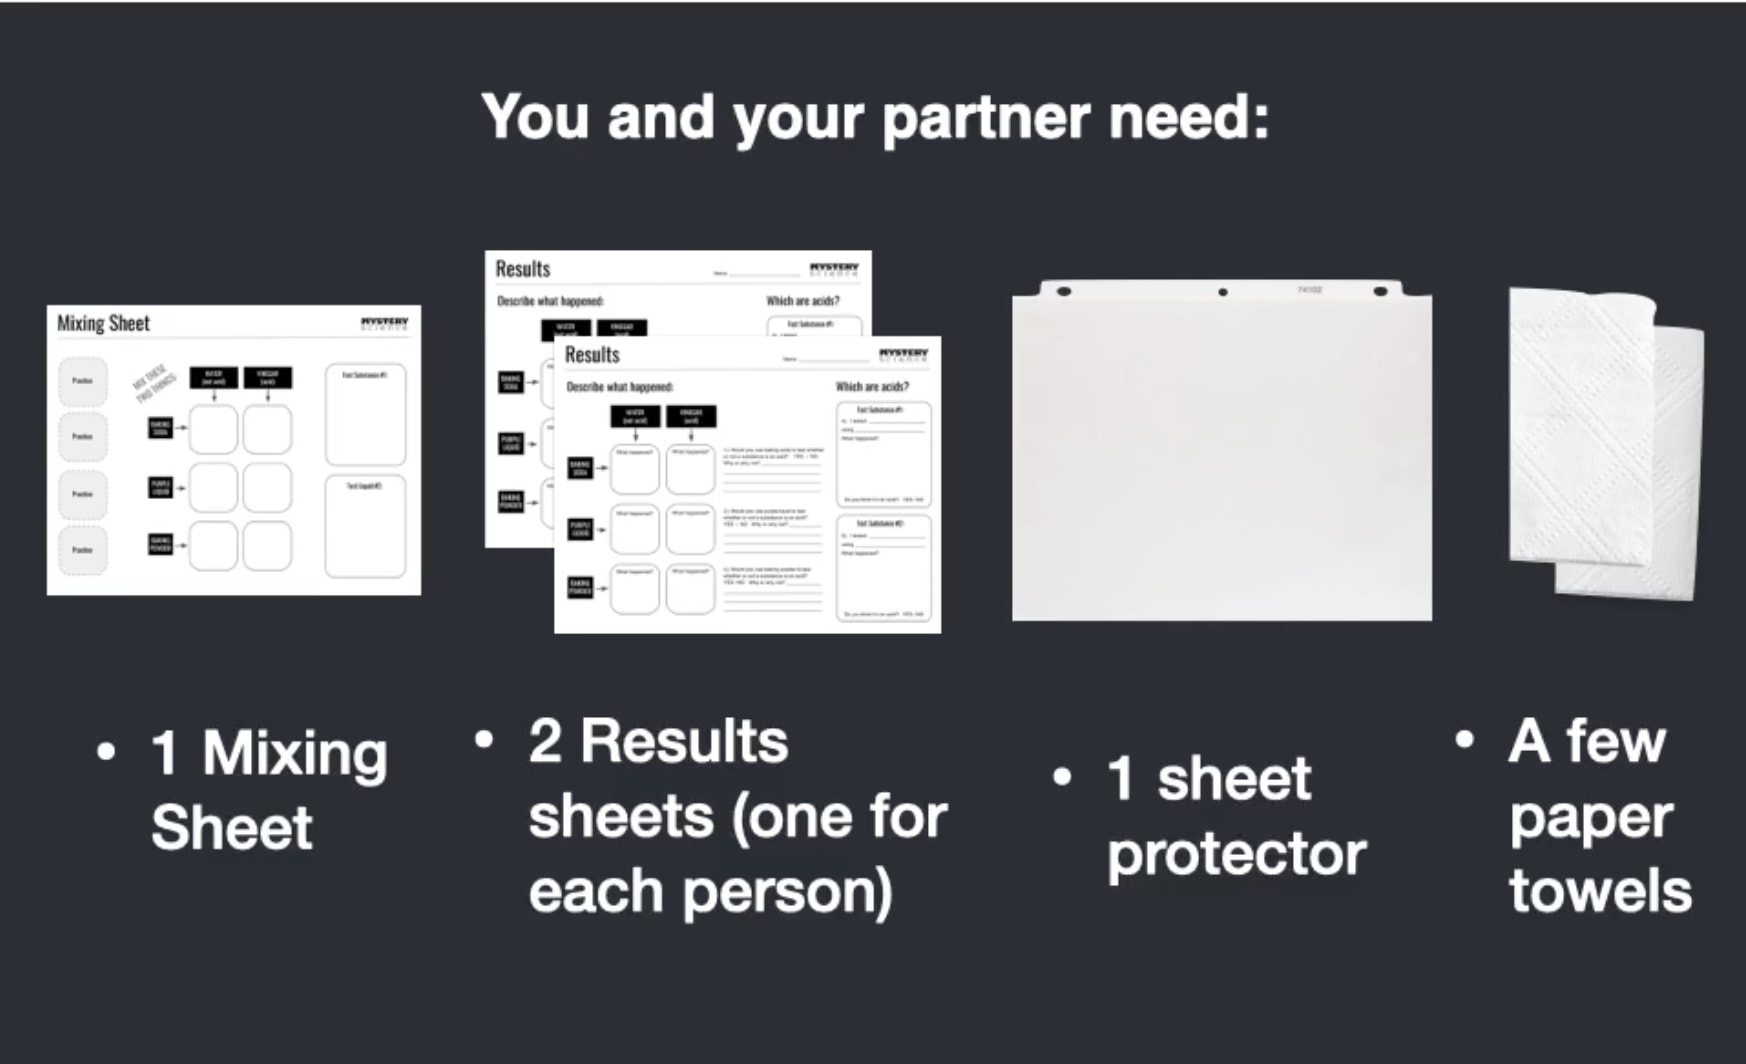
- "Mixing Sheet" printouts
- "Results" printouts
- Sheet Protector
- Paper Towels
From this station, each pair of students will bring the following back to their desk:
Station D: Unknowns
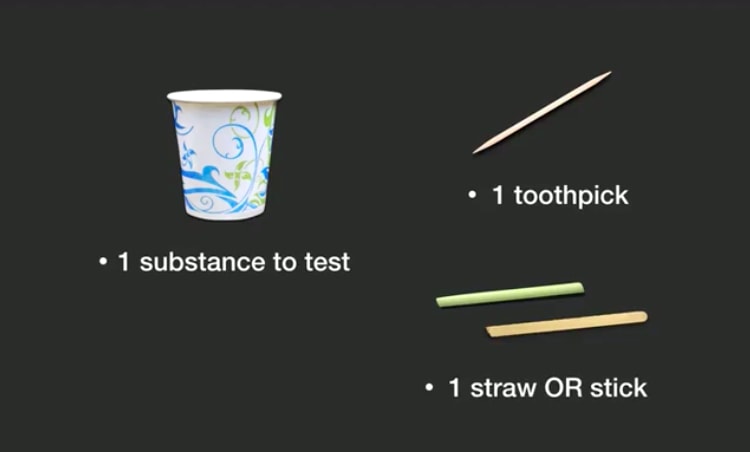
- Unknown Substance “A” Cups
- Unknown Substance “B” Cups
- Straws (1 or 2 per group, depending on unknown substance type)
- Stir Sticks (1 or 2 per group, depending on unknown substance type)
- Toothpicks
From this station, each pair of students will bring the following back to their desk:
Teacher Background
The purple liquid that you prepare from the cabbage (or black beans) is called an indicator. There’s a pigment in purple cabbage and black beans that changes color when it reacts with an acid or base. You and your students should notice that the color of the liquid changes to a reddish/pink when you add it to any of the acids (e.g. vinegar). You can then use this information to test unknown liquids. If the liquid turns pink, then it’s an acid.
You and your students will also notice that when baking soda is mixed with vinegar, there is fizzing that indicates an acid-base reaction. But baking soda does not fizz when mixed with water, making it a good acid indicator. Baking powder will also fizz with vinegar. But you will notice that baking powder will also slightly fizz when water is added. This is because baking powder is actually a mixture of baking soda (base) and cream of tartar (acid). This is why it reacts with both water and vinegar. So baking powder is not a good indicator because it fizzes when any liquid is added.
Lesson 4: Chemical Reactions
The Great Goo Experiment
| Goo Testing printout | Print 15 copies |
| Goo Testing Answer Key teacher-only resource | 1 copy |
|
Clean-up Supplies (Eg. Paper Towels)
|
1 roll |
|
Mixing Bowl
|
2 bowls |
|
Table Covering (eg. Trash Bags)
|
16 bags |
|
1 Cup (8 oz) Container
|
1 container |
|
Baking Soda
|
1 teaspoon |
|
Dixie Cups (3 oz)
For Part 2 of the activity.
|
Details
60 cups
|
|
Dixie Cups (3 oz)
For Part 1 of the activity.
|
Details
48 cups
|
|
Measuring Cup
|
1 cup |
|
Measuring Spoons
|
1 set |
|
Milk
|
8 tablespoons |
|
Multi-Purpose Glue
We suggest multipurpose glue. For reference, 2 tbsp = 1 oz.
|
Details
3 cups
|
|
Paper Plates
|
30 plates |
|
Plastic Straws (Not Bendable)
|
32 straws |
|
Sheet Protector
You can also use taped-down waxed paper or Press n' Seal.
|
Details
15
|
|
Toothpicks
|
150 toothpicks |
|
White Vinegar
|
8 tablespoons |
|
Ziploc Bags (Sandwich Size)
|
30 bags |
|
Borax
|
8 teaspoons |
You will need access to water for this activity.
We suggest students work in pairs and two pairs of students share supplies at a group table. Homeschool students can work on their own.
Plan Your Time
You may want to divide this activity into two sessions.
- Part 1 (testing substances) takes 15 to 20 minutes.
- Part 2 (creating goo) takes another 15 minutes. Begins at Step 12.
To make the baking soda solution, use your 1-cup container to mix 1 cup water and 1 teaspoon baking soda.
To make the glue mixture, mix equal amounts of glue and water in a mixing bowl. This glue mixture will be enough for both parts of the activity.
To make the borax solution (for up to 32 students), in the other mixing bowl, mix 8 teaspoons borax powder with 4 cups warm water. It is okay if all of the borax powder doesn't dissolve. This borax mixture will be enough for both parts of the activity.
If you are splitting the lesson between two days, just keep the mixtures covered so they don’t dry out.
Prepare the Straws
Students use straws as pipettes for transferring liquid from a Dixie cup. Regular-length straws cause Dixie cups to tip over and spill. To prevent this from happening:
- cut each straw in half.
- lay the straws side by side with their ends squared up.
- eyeball ½ inch away from the cut edge and lay a ruler down at this point.
- draw a line across the straws using a permanent marker, as shown below.

Prepare the Testing Supply Cups for Part 1
- Count out 6 cups for each group of 4 students (or homeschool student).
- Use a permanent marker to mark cups for each group.
- W for Water
- S for Baking Soda solution
- B for Borax solution
- G for Glue/water mixture
- V for Vinegar (If you use paper cups, be aware that vinegar will leak through some brands after an hour and a half. Plan accordingly.)
- M for Milk
- Put 1 tablespoon of the corresponding supply in each cup.
Prepare the Mystery Goo Cups for Part 2
Using the remaining Dixie cups, you’ll prepare a cup of glue mixture and a cup of Borax solution for each student. * Add 2 Tbsp of glue/water mixture in half of the Dixie cups. * Add 1 Tbsp of borax solution in each to the other half of the cups.
Note that for homeschool students, you can always make a larger batch of goo as long as you mix the glue/water mixture with the borax solution in a 2:1 ratio.
Separate Supplies for Easy Distribution
In Part 1, your students will first practice using a straw to put water onto their testing mat. They’ll need the following supplies for this:
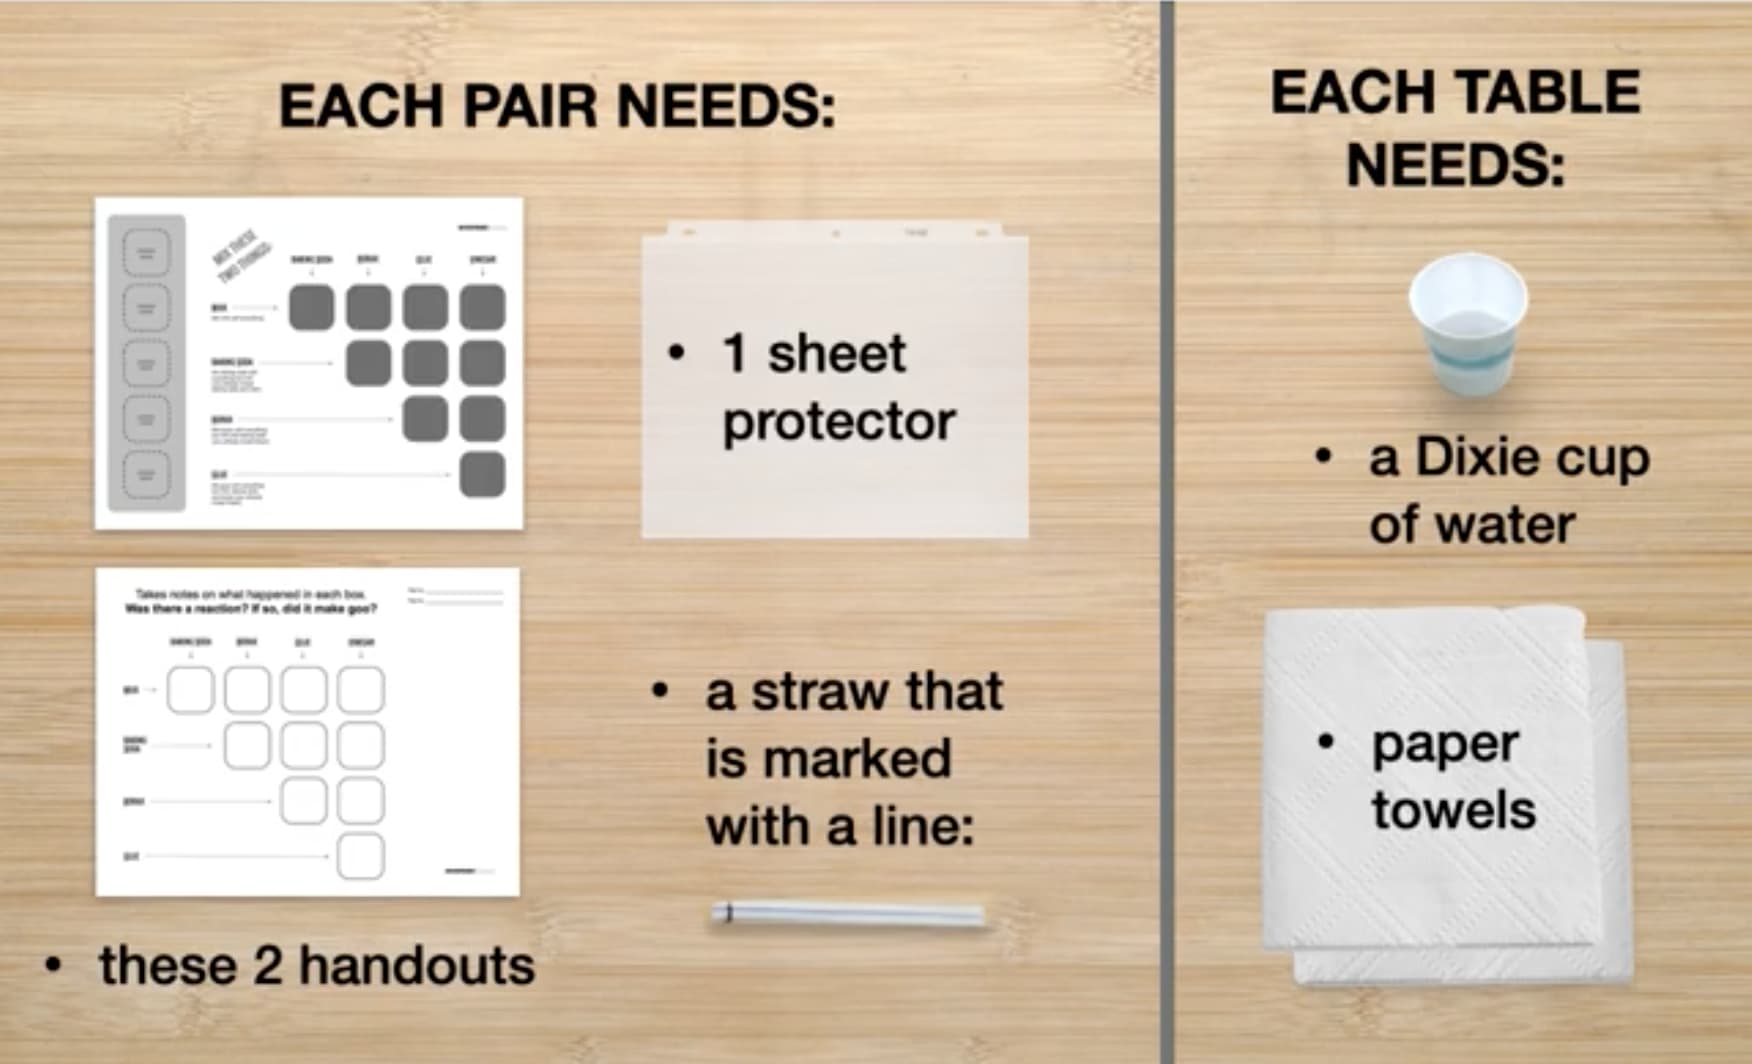
Then, students will combine and test different substances to see if they react. Students will share supplies with others at their table and will need the following:

In Part 2 of the activity, students will each create their own small bag of goo to take home with them. They will each need the following supplies:
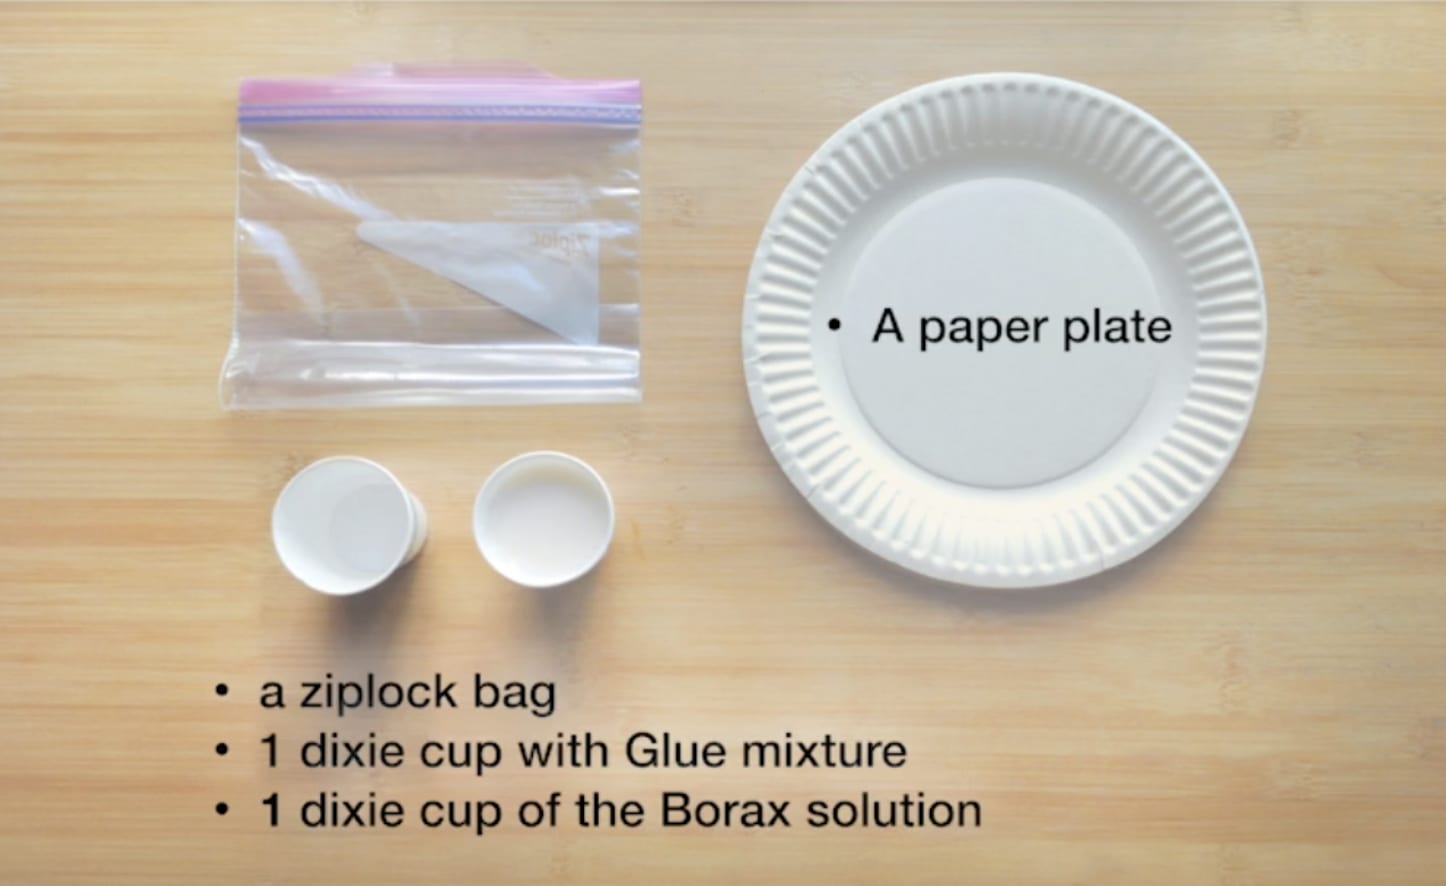
You may want to set up supply stations for easier classroom distribution.
Borax, while safe when diluted, can be a mild skin irritant to some people, especially those with sensitive skin. If you are concerned, you may want to consider having your students wear gloves or use one of our Alternative Goo Recipes here .
Lesson 5: Gases & Particle Models
Bag of Bubbles
| Capturing Chaos worksheet | 30 copies |
| Stretchy Bag Templates printout | Print 8 copies |
|
Clean-up Supplies (Eg. Paper Towels)
|
1 roll |
|
Safety Glasses
|
30 pairs |
|
Scissors
|
30 pairs |
|
Baking Soda
|
4 cups |
|
Dixie Cups (3 oz)
|
30 cups |
|
Measuring Cup
|
1 cup |
|
Plastic Plates (10")
You can also use large, sturdy paper plates.
|
Details
15 plates
|
|
Plastic Spoons
|
30 spoons |
|
Solo Cups (9 oz)
You can use any plastic container that can hold about 1/2 cup of liquid.
|
Details
16 cups
|
|
White Vinegar
|
4 cups |
|
Ziploc Bags (Snack Size)
We do not suggest using sandwich size bags because they need more vinegar and baking soda to inflate, and the resulting explosion is likely to overflow the plastic plate.
|
Details
30 bags
|
We strongly recommend that students wear eye protection for this activity.
We suggest students work in pairs for the first activity, and in groups of four for the second activity. Students working alone will need a partner for the first activity, and a few friends to help with the second activity.
Prepare the Vinegar and Baking Soda
Divide your plastic cups (or plastic containers) in half. For each of the cups in one of the piles, pour about ½ cup of vinegar. For the other cups, pour about ½ cup of baking soda into each.
Separate Supplies for Easy Distribution
For the first activity, students will need the following supplies, plus a recommended pair of safety goggles for each person:
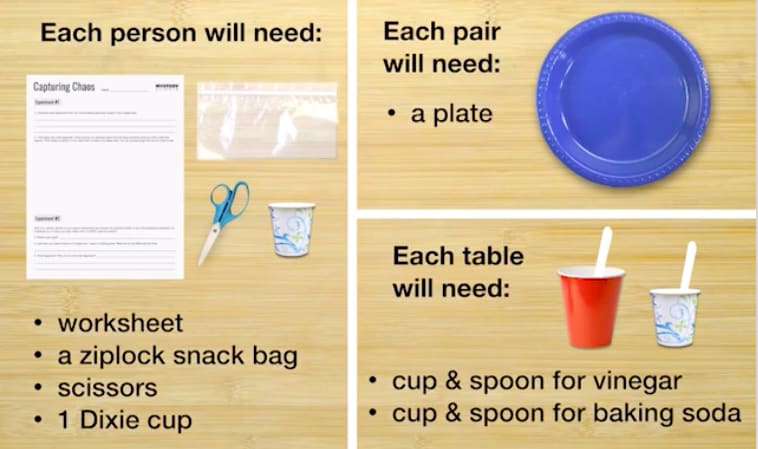
In the second activity, students will work in groups of four and will need the following materials:

You may want to separate these for ease of classroom distribution.

